The Wax Casting Process in Custom Silver Jewelry: The Steps, Workflow, and Key Considerations
Wax casting, or lost-wax casting, is a highly precise and essential technique in the world of custom silver jewelry making. It allows the creation of intricate designs and high-detail features that would be challenging to achieve with traditional molding methods. The lost-wax casting process involves several key stages, including the creation of the wax tree, the molding process, the melting of the metal, and the cleaning of the final piece. This article aims to explore the workflow of the wax casting process with a particular focus on the crucial step of the mold pouring procedure (“倒模”), as well as the important considerations during each phase.
I. Overview of the Lost-Wax Casting Process
Lost-wax casting has been a fundamental method in jewelry making for centuries due to its ability to produce highly detailed and complex designs. This technique involves the following stages:
- Creating the Wax Model – A model of the piece is made from wax.
- Building the Wax Tree – Several wax models are connected to form a “tree.”
- Mold Preparation – A shell mold is created by covering the wax tree with a heat-resistant material like plaster.
- Wax Removal – The mold is heated to melt away the wax, leaving a cavity in the shape of the desired design.
- Metal Melting – The metal (e.g., silver) is melted to a liquid state.
- Metal Pouring – The molten metal is poured into the mold to create the jewelry.
- Shell Removal – Once the metal has cooled and solidified, the shell is removed.
- Finishing Touches – The piece is cleaned, polished, and any remaining imperfections are removed.
Each of these steps must be executed with precision and care to ensure the success of the process. The mold pouring process (倒模) plays a vital role in shaping the final piece, and it requires meticulous attention to detail to ensure that the final cast piece meets the desired specifications.
II. Detailed Workflow of the Mold Pouring Process
The mold pouring process in lost-wax casting involves several steps, including preparing the wax tree, creating the mold, baking the mold, and pouring the metal into the mold. Below is an in-depth breakdown of each step in the process:
1. Creating the Wax Tree
The first step in the lost-wax casting process is the creation of the wax tree. This involves forming a model of the jewelry piece using wax, which will later be used to create a mold for the metal casting.
- Procedure: A wax model of the desired jewelry piece is created through either hand carving or injection molding. Multiple wax models are then attached to a central wax “sprue” to form the “wax tree,” which allows the molten metal to fill each model uniformly.
- Considerations: The precision of the wax model is crucial, as any imperfections or air bubbles in the wax can result in defects in the final piece. Care should be taken to ensure that the wax models are free of cracks, crevices, or inconsistencies. Additionally, the size of the sprue and the placement of each wax model on the tree must be carefully planned to ensure even metal distribution during the pouring process.
2. Pouring the Plaster Shell (Mold)
Once the wax tree has been completed, the next step is to create the mold, which is typically done using a plaster-like material. The mold will eventually form the negative shape of the jewelry piece.
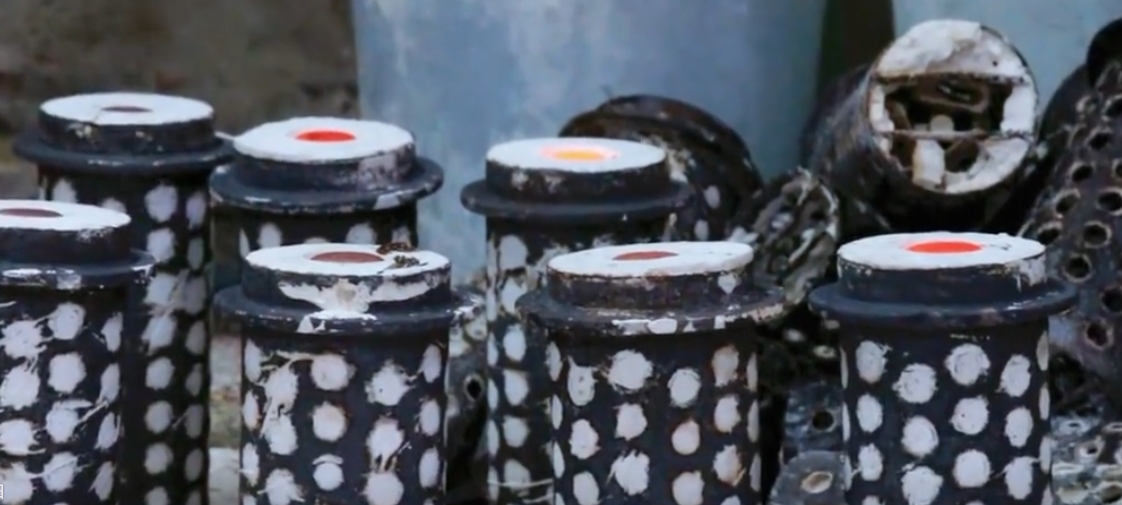
- Procedure: The wax tree is carefully placed in a stainless steel tube or casing, and a special plaster or gypsum slurry is poured over the tree. This plaster is made by mixing gypsum with water, creating a liquid slurry that can flow into all the intricate details of the wax model. The plaster mold is then allowed to set for several hours (typically 6-12 hours) to harden.
- Considerations: The plaster slurry must be carefully mixed to the right consistency. If the slurry is too thick, it may not flow evenly and may leave air pockets, while if it is too thin, it could result in a fragile mold that could easily break. Additionally, the mold must be allowed to set undisturbed for a sufficient amount of time to ensure it hardens completely. During this step, the mold must also be vacuumed to remove any air bubbles.

3. Vacuuming the Mold
After the plaster is poured, it is essential to ensure that no air bubbles or gaps remain within the mold. This is typically done by applying a vacuum to the mold.
- Procedure: The mold is placed under a vacuum chamber, which pulls the air out of the plaster and helps it settle into every crevice of the wax model. This ensures that there are no pockets of air trapped in the mold that could disrupt the final casting.
- Considerations: The vacuum process must be conducted carefully to avoid damaging the mold or creating cracks. The pressure within the vacuum chamber should be monitored, and the mold should be placed in the chamber for the correct duration to ensure full evacuation of air.

4. Baking the Mold
After the plaster shell has hardened, the mold must be baked to remove the wax and fully prepare it for metal pouring. This step is critical for ensuring that the mold is free of any residual wax and moisture.
- Procedure: The mold is heated in a kiln or oven to temperatures typically ranging from 800°C to 1000°C (1472°F to 1832°F). The high heat causes the wax to melt and drain away from the mold, leaving behind a hollow cavity. The baking process also serves to dry the mold thoroughly, ensuring that it can withstand the molten metal during pouring.
- Considerations: The baking temperature and time must be carefully controlled to ensure that all the wax is completely removed. If the temperature is too low, residual wax may remain in the mold, which can lead to defects in the final metal piece. The baking time should also be optimized to ensure that the mold reaches the desired level of heat without overheating, which could cause cracks or other issues.

5. Melting the Metal
Once the mold is baked and free of wax, the next step is to melt the metal, typically silver, that will be poured into the mold to create the jewelry piece.
- Procedure: The metal is melted in a crucible or furnace to the appropriate temperature. Silver, for example, has a melting point of approximately 962°C (1764°F), so the metal must be heated above this point to ensure it is in a liquid state when poured into the mold.
- Considerations: The purity of the metal is critical in ensuring the final piece is of high quality. Any impurities or lower-quality metals can negatively impact the finished product. The melting temperature must also be precisely controlled to avoid overheating or underheating the metal.
6. Pouring the Metal
With the mold prepared and the metal melted, the next step is to pour the molten metal into the mold.
- Procedure: The molten metal is carefully poured into the preheated mold, filling the cavity left by the wax tree. The metal must be poured at the correct temperature and speed to ensure that it flows evenly and fills all the intricate details of the mold.
- Considerations: During pouring, the temperature of the molten metal must be maintained to avoid cooling too quickly and causing defects. The pouring process should be steady to prevent air pockets or incomplete fillings. Additionally, the mold should be preheated to ensure that the metal doesn’t cool too quickly when it comes into contact with the mold surface, which can lead to casting defects such as cracks or voids.

7. Cooling and Shell Removal
Once the metal has been poured, the mold must be allowed to cool so that the metal solidifies into the shape of the jewelry piece.
- Procedure: After the mold has cooled for about 10-30 minutes, it is placed into cold water for a process known as “shell removal” or “shell cracking.” This helps to break off the plaster shell and expose the metal casting.
- Considerations: The cooling process must be controlled to ensure that the metal solidifies evenly and doesn’t suffer from thermal shock, which can cause cracks or other issues. After cooling, the mold is carefully broken away from the metal, leaving the final casting.
8. Cleaning and Final Touches
After the metal has cooled and the mold has been removed, the jewelry piece requires cleaning and finishing touches.
- Procedure: The piece is cleaned through several steps, including “acid washing” in a bath of 30% hydrochloric acid to remove any remaining plaster, followed by high-pressure water spraying to clean off any remaining debris. The piece is then polished, smoothed, and any imperfections are corrected.
- Considerations: Cleaning must be done thoroughly to ensure that no residual plaster or wax is left on the metal, which could affect its appearance. Polishing and finishing should be done with care to preserve the design’s details.
9. Cutting and Drying
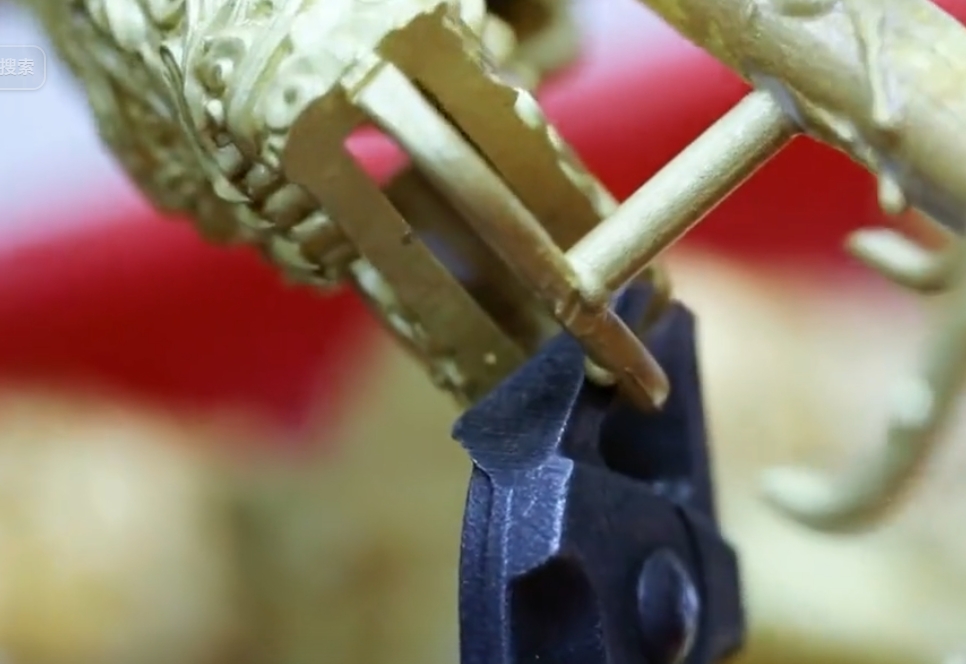
The final step in the casting process involves cutting off any extra material, drying, and weighing the finished piece.
- Procedure: The metal tree is carefully cut away, and any excess metal is trimmed. The piece is then dried and weighed for final quality control.
- Considerations: This step ensures that all excess metal is removed and that the final piece has the desired shape and weight.
III. Key Considerations Throughout the Lost-Wax Casting Process
Successful lost-wax casting requires precision at each stage of the process. Several key considerations can make or break the final outcome:
- Wax Model Quality: Any imperfections or bubbles in the wax model will directly affect the final piece. The wax must be free of cracks, and the model should be precise.
- Vacuum and Shell Quality: The vacuuming and shell-making process should be carefully controlled to avoid air bubbles and gaps.
- Baking and Temperature Control: The baking temperature must be carefully regulated to ensure complete wax removal and thorough drying of the mold.
- Metal Quality: Only high-quality metals should be used to ensure a durable and aesthetically pleasing final piece.
- Pouring Precision: The pouring process should be steady and controlled to prevent defects such as air bubbles or incomplete filling.
IV. Conclusion
The lost-wax casting process in custom silver jewelry involves several complex steps, each requiring careful attention to detail. From creating the wax tree to the final cutting and polishing of the jewelry piece, the process demands precision and expertise at every stage. By following the outlined workflow and considering the key factors involved in each step, jewelers can create high-quality custom pieces that meet both aesthetic and functional requirements. Successful mold pouring is critical in ensuring that the metal flows evenly and fills the intricate details of the design, resulting in a perfect finished piece.
